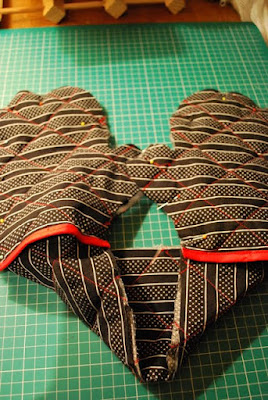
 I cut out 4 gloves of wadding and one main body in wadding. For the fabric I had 4 gloves and 2 main body pieces of fabric.
For the gloves I sandwiched 2 of the fabric pieces between one of the glove wadding pieces.

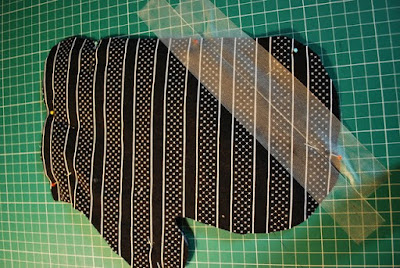
After pinning my fabric sandwiches... I then used my quilting ruler and using the white horizontal line on the fabric and angled the ruler 45 degrees...
... Then I used 2 pieces of tape on that 45 degree angle and then got the old sewing machine ready...
... then I sewed on each side of the tape!
I kept on moving the pieces of tape and sewing... then again using my ruler I found the opposite 45 degree angle and sewed some more.....
Quilting, quilting and more quilting later......
Huzzah!!
 I then bias taped the bottom of the glove and then attached the gloves to the main body by stay-stitching....
I then bias taped the whole of the edge of the gloves.... yes, I was that determined to make something nice for Q!
Then.....
.... DONE!
Reflections....
- Bias taping is still an art-form I have yet to master. T'was my own fault for making the thumb part of the pattern. It was really was hellish to sew and tape around.
- He loves them, but loves them so much he doesn't want to use them!!
- It took ages! Ladies and gentlemen who make and sell stuff like this for a living, I take my hat off to you. This was a day job from drafting to quilting to bias taping, I was exhausted!
Q has been great these last few months, helping me pin my clothes, turning up my hems, bringing me copious amounts of Diet Cokes and snacks and hours spent on his own when we used to be chilling out together. He deserved something nice and seeing as cooking is his 'thing'... I thought, why not?!
OK, back to dressmaking... Onwards with the Clovers. I now have the pattern traced and altered. I'm keeping original patterns intact now and tracing off them. I like it for preservation, thrift and making my mates clothing! Just need to decided on the fabric of my wearable muslin now.... hmmmmm. I'm still thinking 'Dresden'.
Bundana
X
Time Taken: 6 hours
Pattern: Bundana Original
Make again? Yes, but probably miss off the thumb bits and just make it more streamlined for an easy peasy bias experience!
Cost: €3


They look great. I am sure Q will love them. What a sweet idea.
ReplyDeleteWe cooked Sunday dinner today, so I HAD to give them to him! Really happy with them and he now knows why he wasn't allowed to come into the sewing / music room! Hahahaha! Thanks for your comment my dear :-)
DeleteI think they look great, well done for sticking with the bias tape all over, your patience deserves a sainthood! I love that Q loves them so much that he won't use them, I hope he gets over that quickly and takes them for a spin!
ReplyDeleteThey've been taken for a spin after berating him for a few days. Not bad for a first attempt and I was glad I could say a 'thank you' for all his patiece with me being nothing more than a cloth-head at times! I get a bit obsessed with my passions and eat, breath and sleep them! Cheers mate :D x
DeleteLook at you go!!! I have wanted to make an apron for sometime but haven't been brave enough to do it. I love that you r so versatile :D
ReplyDeleteThey look so cute. What a sweet idea:)
ReplyDeletekitchen gloves